
Yanmar ECU Repair – Finding and Fixing a Shorted Diode Inside an Epoxy-Sealed Engine Control Unit
How we diagnosed and repaired a Yanmar 129939-75030 ECU from an IHI 55 excavator using thermal imaging, precision grinding and component-level electronics repair.
At Device Repair Guy in Wellington, we regularly encounter electronic control units that present unusual repair challenges. Some are relatively straightforward to diagnose, while others require patience, specialist equipment and a creative approach to component-level repair.
This particular job involved a Yanmar engine ECU from a 2007 IHI 55 excavator, sent to us by County Excavators & Cartage Ltd.
The ECU had developed an electrical fault that caused the machine’s 10-amp fuse to blow immediately whenever the ignition was switched on.
What made this repair particularly challenging was that the ECU’s electronics were encased in hard epoxy resin, making access to the faulty components extremely difficult.
The Problem – Excavator Blowing a Fuse at Ignition
The excavator was fitted with a Yanmar 4TNV98-EPIKA diesel engine and the following engine control unit:
- ECU manufacturer: Yanmar
- ECU part number: 129939-75030
- ECU model/version: HG01
- Engine: Yanmar 4TNV98-EPIKA
- Machine: 2007 IHI 55 excavator
- Reported fault: 10-amp fuse blowing immediately at key-on
The customer’s diesel mechanic had already carried out electrical checks and suspected an internal ECU short circuit. No external wiring fault had been reported.
The ECU was sent to our Wellington workshop for electronic diagnosis and assessment.
Step 1 – Identifying the ECU Connections and Bench Testing
Before investigating the internal electronics, we needed to establish the ECU’s electrical connections.
Using the Yanmar TNV Series troubleshooting documentation, we identified the relevant ECU pinout and power supply connections.
This allowed us to power the ECU on our workbench under controlled conditions, without needing the excavator itself.
With the ECU powered, we began investigating the suspected short circuit.
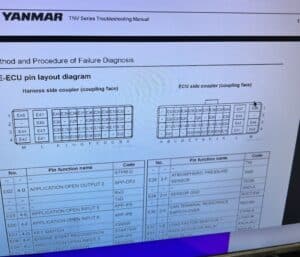
Photo: Yanmar ECU pinout diagram from the TNV Series troubleshooting manual.
Step 2 – Using Thermal Imaging to Locate the Fault
One of the most useful tools when investigating short circuits in electronic control units is a thermal imaging camera.
A shorted electronic component can generate localised heat when electrical power is applied.
We used a thermal camera while bench-powering the ECU and discovered a particular area of the casing that was heating up.
This gave us an important clue about where the faulty component was likely to be located.
Rather than attempting to remove large sections of the ECU’s protective resin, we could concentrate our investigation on a relatively small area.
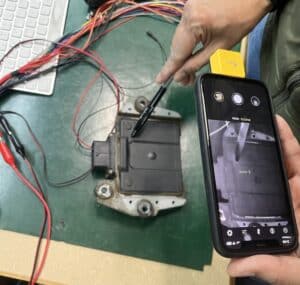
Photo: Thermal camera identifying a localised hot spot on the Yanmar ECU casing.
Step 3 – The Challenge of Removing the Epoxy Resin
Unlike many automotive ECUs that can be opened to expose a conventional printed circuit board, this Yanmar ECU had its electronics embedded in a hard protective epoxy compound.
The epoxy helps protect the electronics from vibration, moisture and the harsh operating conditions experienced by construction machinery.
Unfortunately, it also makes component-level repairs extremely difficult.
To reach the suspected faulty component, we used a hot-air rework station at approximately 400°C to heat the epoxy locally.
The heat softened the material slightly, allowing us to begin carefully removing small amounts of resin.
This was a slow and delicate process. The aim was to remove enough epoxy to reach the faulty component without damaging the surrounding circuitry.
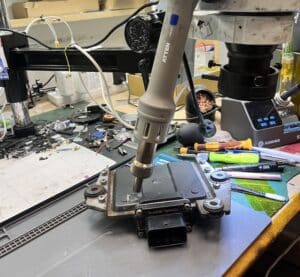
Photo: Carefully heating the ECU’s epoxy casing using a hot-air rework station.
Step 4 – Electronic Archaeology: Excavating the Faulty Component
This part of the repair felt surprisingly similar to an archaeological excavation.
Imagine an archaeologist carefully removing layers of sediment while searching for dinosaur bones. Remove too little material and nothing is revealed. Remove too much, or use too much force, and the object underneath can be permanently damaged.
We faced essentially the same challenge, except that instead of dinosaur bones, we were searching for tiny electronic components buried inside hardened epoxy.
Using a miniature precision grinder, we gradually removed the resin around the suspected fault.
The process involved repeated cycles of heating, grinding, inspecting and testing.
We had to work extremely carefully because the circuit board, component connections and copper tracks were hidden beneath the material.
A small mistake could have caused irreversible damage to the ECU.
After considerable time and painstaking work, we finally exposed the component responsible for the short circuit.
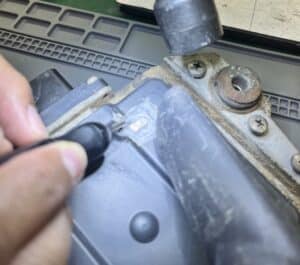
Photo: Precision grinding around the buried electronic component to gain access without damaging the ECU circuit board.
Step 5 – Discovering and Isolating the Shorted Diode
Our investigation identified a short-circuited diode embedded within the ECU.
Diodes are commonly used in electronic control units for electrical protection and controlling current flow. When certain types of protective diode fail short-circuit, they can create an excessive current path that causes a fuse to blow.
To confirm our diagnosis, we carefully cut the connections to the faulty diode, isolating it from the circuit.
We then repeated our electrical measurements.
The short circuit had disappeared.
This confirmed that the diode was responsible for the short we had detected during bench testing.
However, simply removing the faulty diode was not an acceptable permanent repair.
The replacement component was needed to restore the protection provided by the original circuit design.
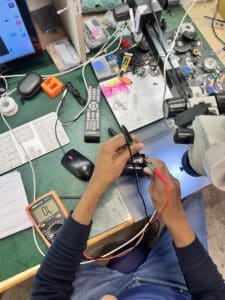
Photo: Electrical testing after isolating the failed diode confirmed that the short circuit was no longer present.
Step 6 – Finding a Replacement Diode
We now faced another problem.
Although we had located and isolated the defective diode, the remaining component was still surrounded by extremely hard epoxy.
Removing more material to completely extract and replace it would have required further grinding very close to the ECU’s circuit board.
This introduced an unnecessary risk of damaging the copper tracks or neighbouring components.
Instead, we decided to take a different approach.
We located an identical diode in another ECU that had suffered an unrelated fault.
This provided a suitable donor component for our repair.
Rather than attempting to install it deep inside the excavated cavity, we chose to mount the replacement diode externally, connecting it into the appropriate circuit.
This allowed us to restore the diode’s electrical function while avoiding further invasive excavation of the original ECU.
Step 7 – Installing the Replacement Diode Externally
The replacement diode was installed outside the ECU casing, with electrical connections made to the relevant points of the original circuit.
This approach offered several advantages:
- It avoided further grinding close to delicate internal circuitry.
- It allowed us to retain the original ECU rather than replace the entire unit.
- It restored the electrical function of the failed diode.
- It minimised additional disturbance to the epoxy-encapsulated electronics.
The external component and its connections were then secured and protected.
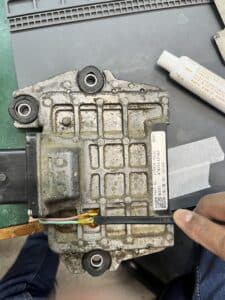
Photo: Replacement diode installed externally on the Yanmar ECU rather than buried inside the original epoxy casing.
Step 8 – Sealing and Protecting the Repair
After completing the electronic work, we needed to protect the areas where the original casing had been opened.
The excavated section was sealed using epoxy and gasket compound to help protect the repaired area and electrical connections from environmental exposure.
This is particularly important for an ECU fitted to construction equipment, where vibration, dirt and moisture can be significant concerns.
The result was a component-level repair that addressed the identified internal short without requiring replacement of the complete ECU.
Why Repair a Yanmar ECU Instead of Replacing It?
Replacing an engine control unit on older construction machinery can be expensive and sometimes difficult.
Depending on the model, replacement ECUs may be costly, difficult to source or require additional programming and configuration.
Repairing the original unit can offer several benefits:
- Potential cost savings: Repairing an individual failed component may be more economical than purchasing a complete ECU.
- Original ECU retained: Keeping the original control unit can avoid some compatibility and configuration issues associated with replacements.
- Reduced electronic waste: Repairing existing electronics helps extend the service life of valuable machinery.
- Specialist fault investigation: Component-level diagnosis can identify faults that are not visible through ordinary engine diagnostic equipment.
Not every ECU can be repaired successfully, particularly when internal circuit boards or processors have suffered extensive damage.
However, this Yanmar ECU demonstrates why careful electronic diagnosis is worth considering before replacing an expensive control module.
ECU Repair Services in New Zealand
At Device Repair Guy, we provide electronic diagnostics and component-level repairs for automotive, agricultural, industrial and construction machinery control modules.
Our workshop is equipped for investigations involving short circuits, damaged electronic components, power supply faults and other internal ECU problems.
We accept ECUs sent from customers and workshops throughout New Zealand, including Auckland, Hamilton, Tauranga, Christchurch and regional areas.
If your Yanmar engine ECU is causing blown fuses, failing to communicate or preventing your machine from starting, we can assess whether an electronic repair may be possible.
Please note: An initial ECU diagnostic assessment is not a guarantee that a fault can be identified or successfully repaired. Some faults require additional investigation, and certain failures may be beyond economical repair.
Have a faulty ECU?
Contact Device Repair Guy to arrange an assessment or send your ECU to our Wellington workshop.
Learn more about our automotive and industrial electronic repair services
Start the ECU repair assessment process
Device Repair Guy – 148 Lambton Quay, Wellington, New Zealand.